
Guest Blogger Danielle from the Style and Beauty Doctor keeps bringing the beauty bombs, and today teaches you lovelies how to apply the makeup equivalent of fashion’s LBD: The Smoky Eye!
Read on for tips on how to apply this classic look for holiday parties, date nights, and beyond!
********************************************************************************************************************
Makeup trends come and go, but the smoky eye remains. Makeup veterans can perfect a smoky eye in their sleep, but makeup novices might need some help, so I’ve broken down the steps to help you get yours!
You’ll need: an eyeshadow base (like MAC Paints or Urban Decay Primer Potion), a dark eyeshadow (black, navy, gray, burgundy, navy blue, etc), a medium tone shade (try one close to your skin tone), a highlight shade (a shade 2-3 shades lighter than your skin tone or a light silvery or sheer gold shade), a medium sized eyeshadow blending brush (like MAC #224), a large sized eyeshadow brush (like MAC #217), eyeliner, mascara, and false lashes (optional).

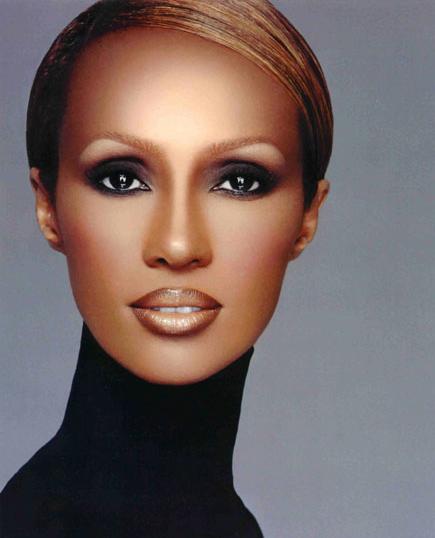
The most simple way to create a smoky eye (like Rihanna’s above) is to line your eyes with a dark eyeliner pencil (black, bronze, purple, green, whatever color you choose) and then smudge the line upwards with either a eyeshadow brush like MAC#214, a Q-tip or the tip of a makeup sponge. Follow with two to three coats of mascara.

To get a bit fancy with it, you’ll need to layer your products for the boldest, longest-lasting smoky eye.
Here’s how:
1. Since a smoky eye can get a bit messy, it may make sense for you to do your eye makeup before any face makeup (so you don’t ruin your foundation with dark shadow fallout).
2. Apply your eyeshadow base all over your eye lid (including the brow bone). You can use your fingers–dont worry, no one’s watching.
3. Apply your medium tone shade to the lid with the medium blending brush. Be sure to carefully blend all over.
4. Apply the highlight shade to your brow bone. A highlight helps to frame the eye and “finish” your eye look.
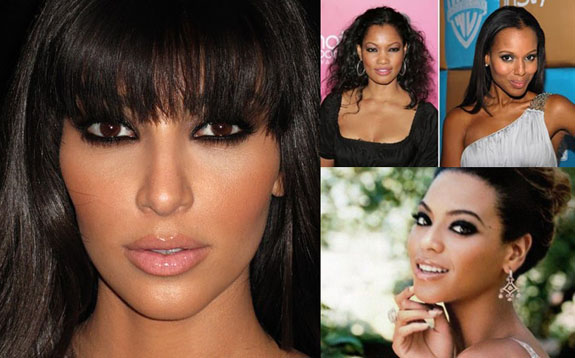
5. There are many different shapes to play around with when it comes to the smoky eye, but here are some tips for applying the dark shade for your eye shape:
Close set eyes: apply the dark shadow color in a sideways V shape at the outer ends of the eyes with the large blending brush (to get a nice smooth look, blend in a quick circular motion so that there are no harsh lines). Dot the highlight shade in the inner corners of the eyes to “create space” and open up the eyes.
Deep Set Eyes: these eyes are already naturally defined, but to bring this eye shape out more, use highlight in the inner corners and go a little heavy on the dark shade in the crease.
Hooded eyes: the crease seems to be “hidden” by the upper fold of skin on this eye shape, so focus on the outer V area of the eye when it comes to placing the dark shade.
Monolid: since this eye shape has no defined crease, you’ll have to create one with a dark shadow. After applying your highlight and medium shade, move your large blending brush where the crease would be in a “windshield wiper” back and forth motion with the dark shadow color.
Almond: this eyeshape is more symmetrical than its cousins, so you can play around with different shapes.
Wide set eyes: in order to “close” the space in between wide set eyes, use your dark shade in the inner corners of the eyes.
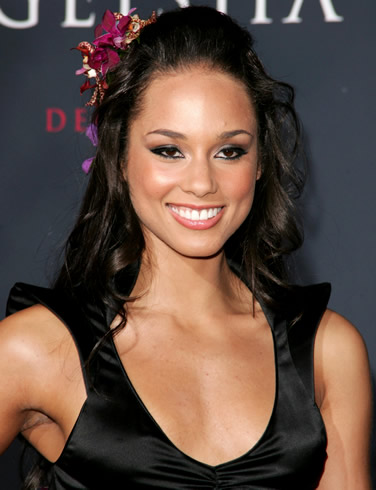
6. After applying your dark shade, line your eyes with eyeliner (I love MUFE Aqua Eyes for pencil, Stila Smudge Pots for gel, and MAC Liquidlast Liner for liquid).
7. Apply 2-3 coats of mascara to finish. (Maybelline Lash Stiletto or L’oreal Voluminous are two to try)
8. For some extra vava voom apply false lashes. Check out How to Get Luxurious Lashes for a quick guide on how to apply lashes.
And you’re done! Once you get the hang of it, play around with different colors and shapes to see what cool looks you can come up with. Then just try and stop blowing kisses at your fierce reflection.
******************************************************************************************************
Great tips, as always! I might be pulling out the smoky eye for my Thanksgiving Dinner Party on Thursday!
And y’all, I’ve found that those three color compacts help so much with this! Just place the medium color on your lid, place the lightest color just beneath your brow bone, then use the darkest color in your crease to create the smoky eye illusion. If you need the most simple tools possible (like me) try these:
Smootches!
thanks for this!!!! i’ve been googling this for the longest
Late, but I just did this. LOVE IT!!!!
omfg that last picture is the most disgusting photoshop job that i have ever seen. give your site some dignity, and take it off :O